


How to Add a Product in WooCommerce
One of the first steps after installing WooCommerce is adding products. With WooCommerce, you can sell physical goods, digital products, services, and more.
Adding a Physical Product
WooCommerce supports both physical products that would be shipped to a user, as well as virtual products. In this section, we will show you how to add a physical product to your WooCommerce site.
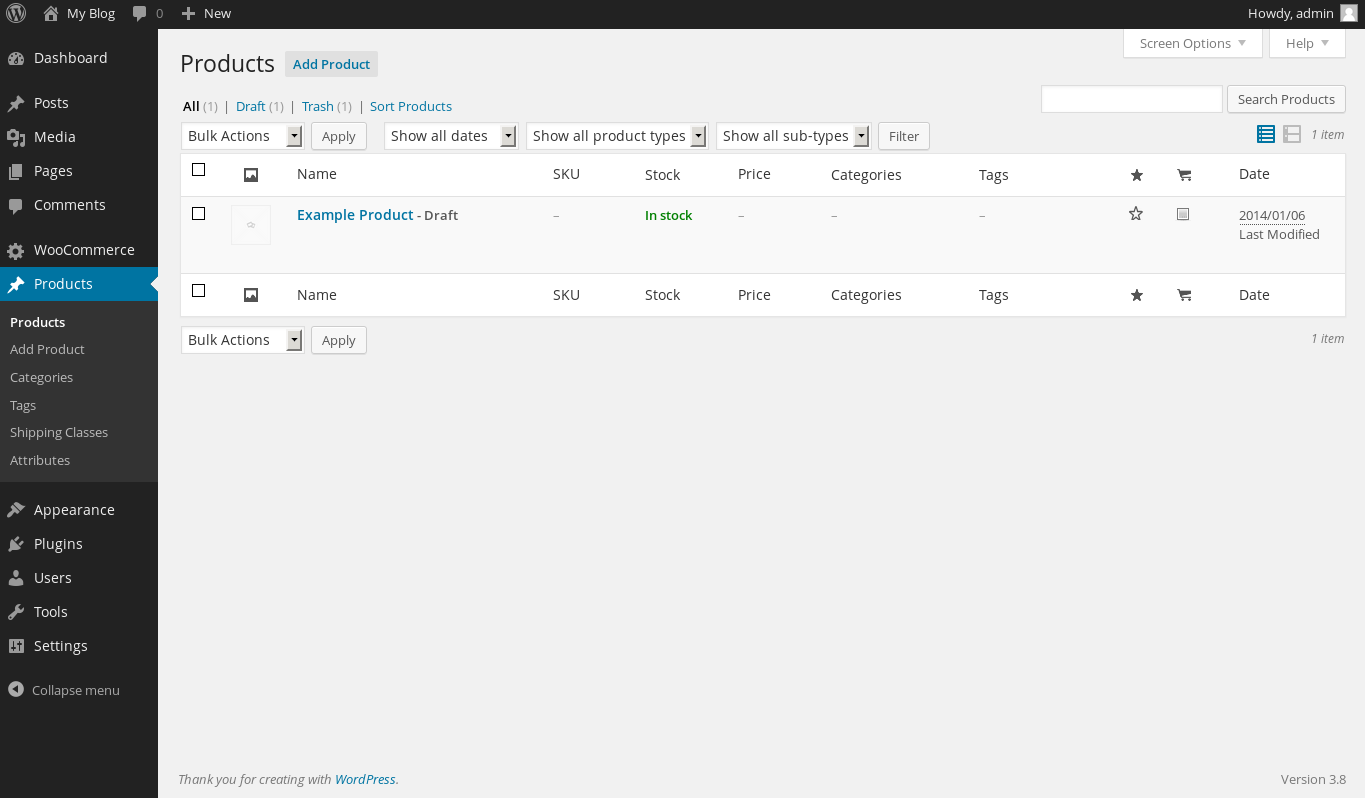
- From your WordPress dashboard, look to the left side menu bar and click on Products. This will display any products that you may already have set up. Most will not have any products here yet. To create one, click the Add Product button at the top of the page.
- Now that you are on the new product page, first, you will need to give your product a name. This name will display within any product listings on your WooCommerce/WordPress website. In the field at the top of the page, enter your new product name.
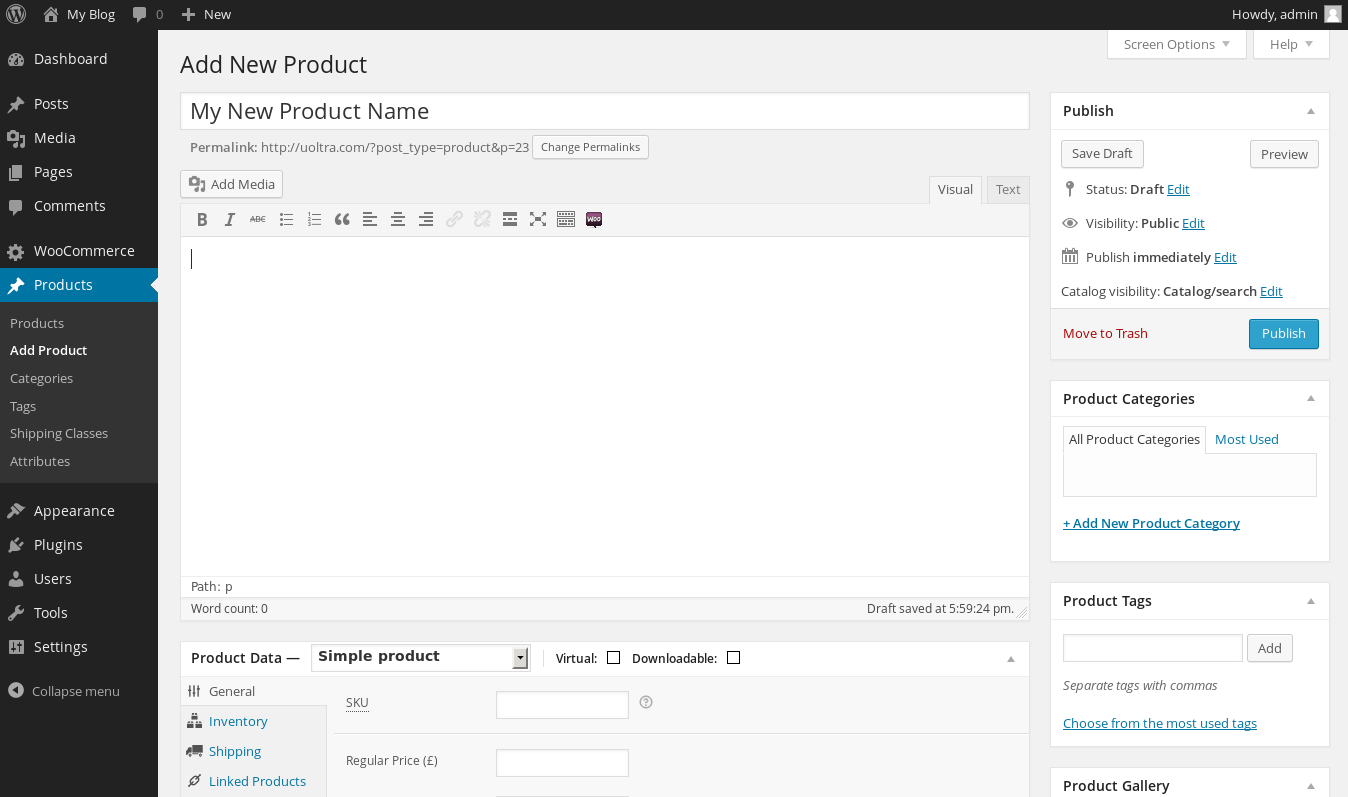
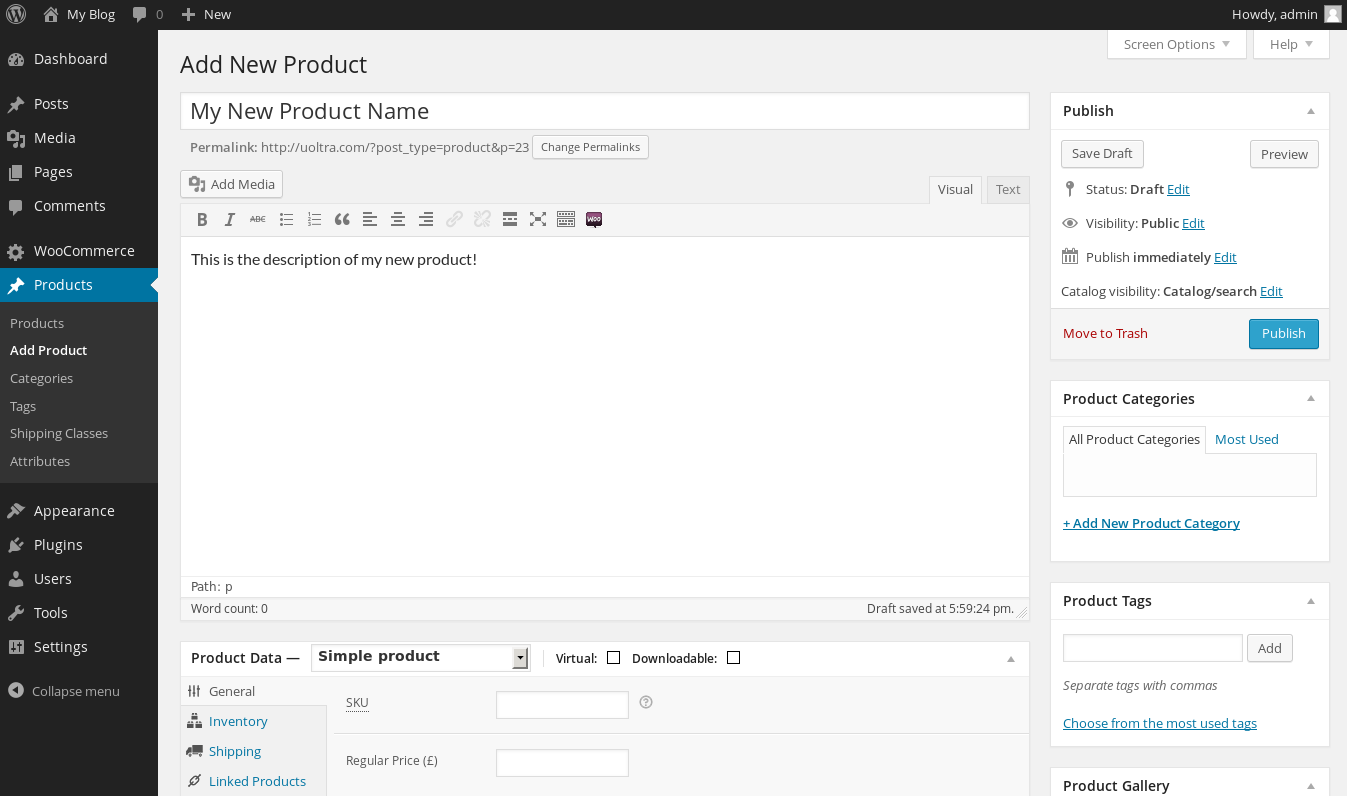
- Next, you will need to enter a product description. The product description is entered into the large text box directly under the product title. This will be displayed when a user visits the page that displays your full product information.
- The next thing you will see when scrolling down this new product page is the product data box. In this box, you will be able to set various options for your WooCommerce product such as pricing, inventory, and shipping.
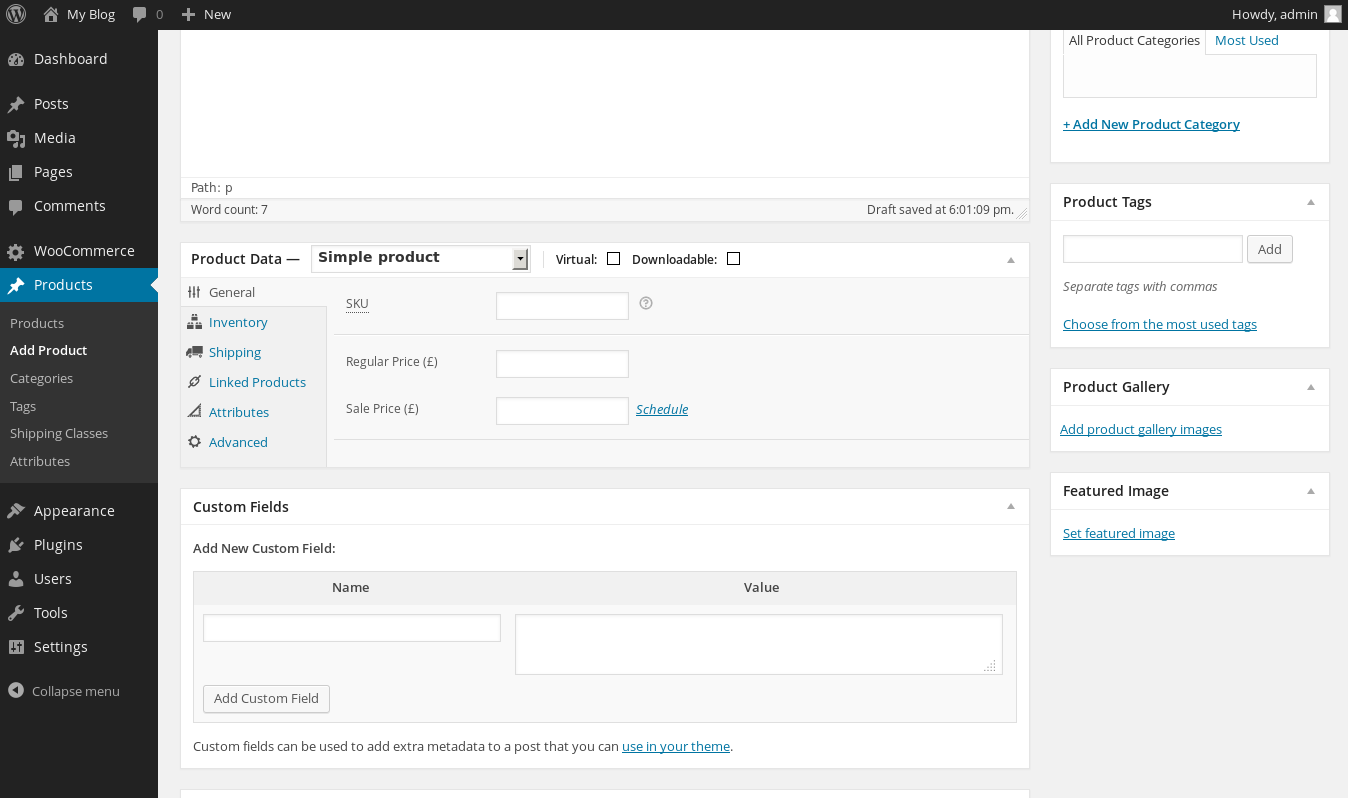
- By default, you should be on the General tab. If not, click on it.
- Now, you will need to enter a few options here. First, enter a unique product identifier for the SKU. This will help you keep stock of individual items when many orders are coming in.
Under the SKU, you will see Regular Price and Sale Price fields. The regular pricing is the price of the product when it is not on sale. The Sale Price field is one that is used if you are running a sale on this particular product. Entering a price here will allow users to purchase the product at that sale price, instead of the regular pricing. Within this field, you may not see the currency that you want to use.
In that case, you may review our article on changing currencies within WooCommerce.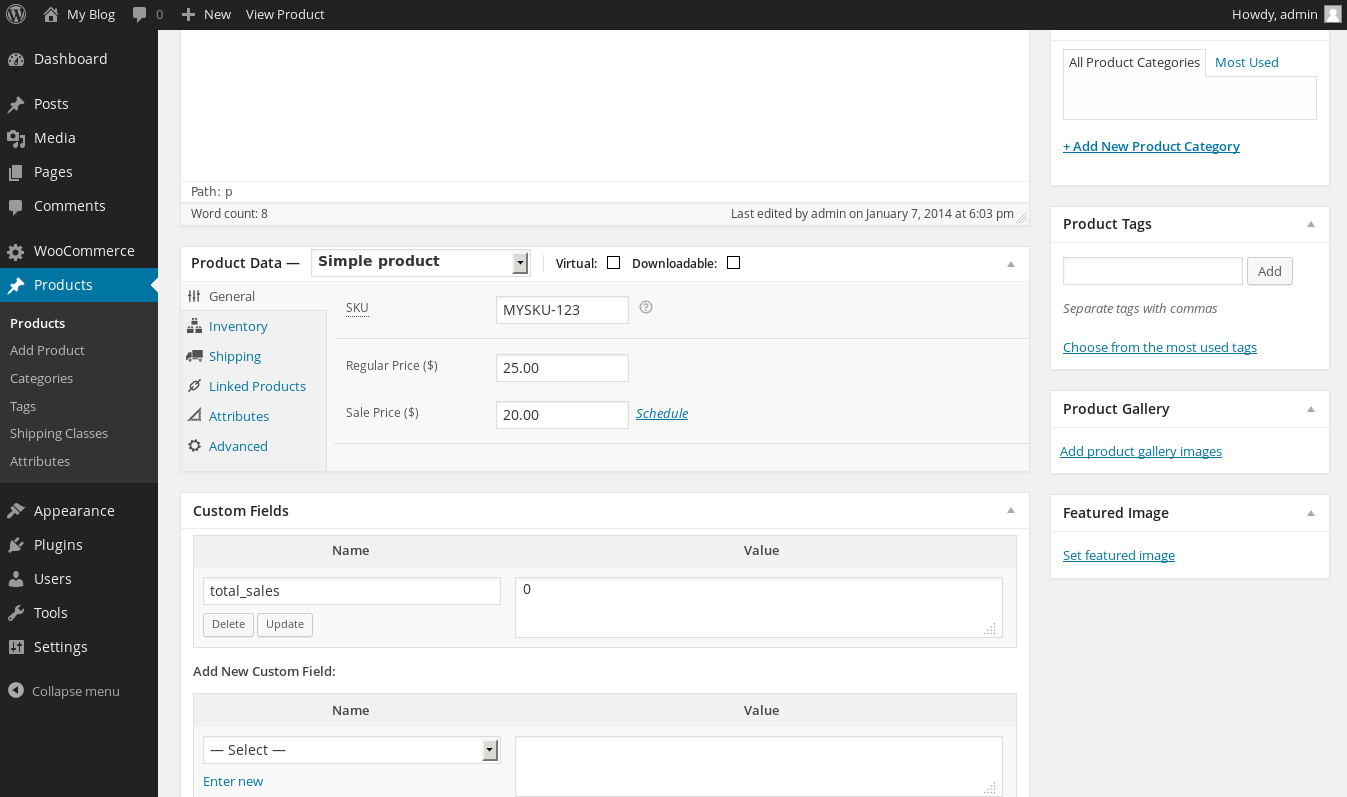
- Now that you have made the appropriate changes to the General tab, you will want to move over to the Inventory tab. Click on Inventory in the tab selection bar on the left side of the product data section.
On this tab, you will see various options regarding how much of the item is in stock, the status of the item, and backorders. For a more in-depth look at this section, take a look at our article on managing stock in WooCommerce.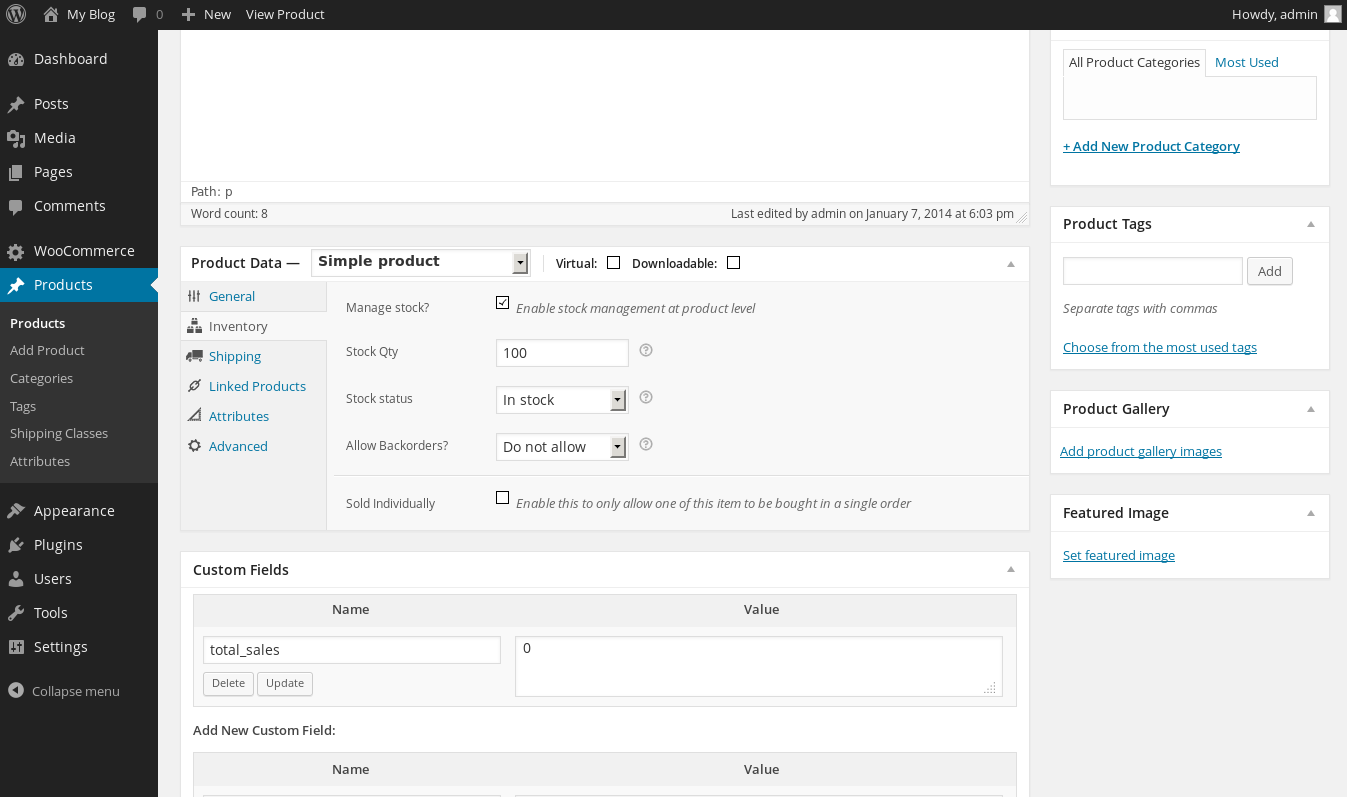
- The next section that we will take a look at is Shipping. To get to it, click on the Shipping tab to the left under the Inventory tab. This tab determines how to handle the shipping of your physical products. Here, you may determine the weight, dimensions, and define the shipping class for this item.

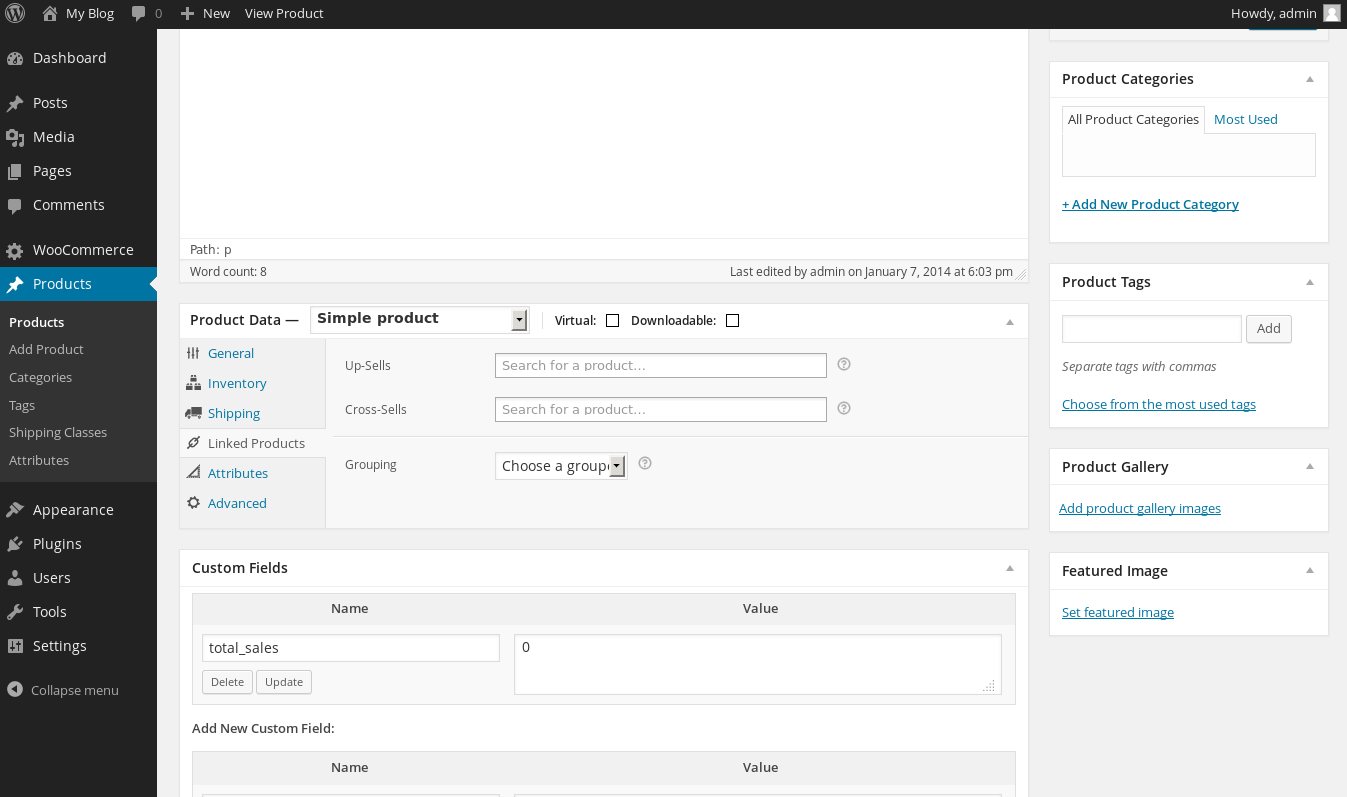
- If you click on the next tab, which is labeled as Linked Products, you will see various options for Up-Sells and Cross-Sells. This will allow you to encourage customers to either purchase an upgraded product from what they are currently looking at via the Up-Sells field or view a similar product using the Cross-Sells field. You may also use the Grouping field to add this product as a part of a group to sell it in a bundle with other products.
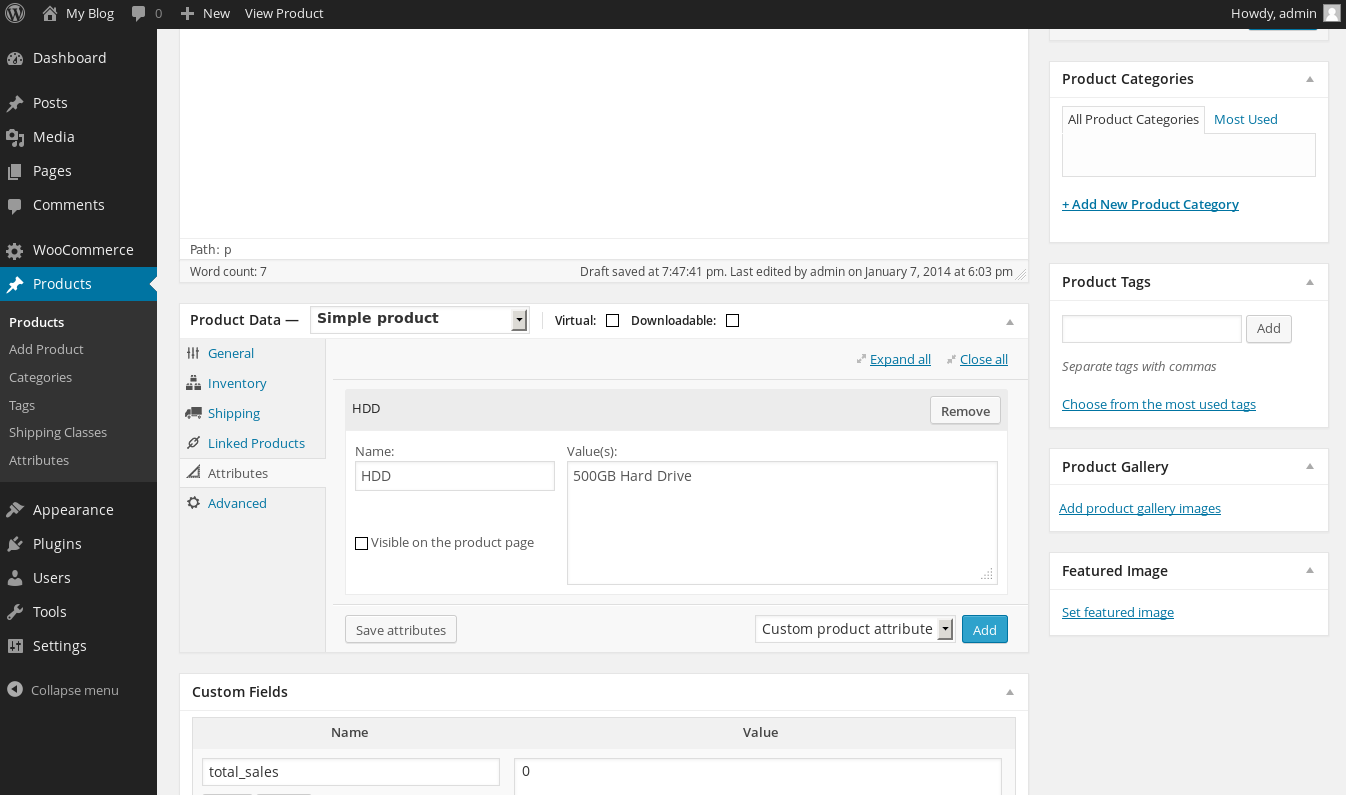
- The Attributes tab will allow your customers to further select products that match what they are looking for. For example, if you were selling computers you could create attributes such as RAM, CPU, HDD, etc. in which you can further add specifications to the product added.
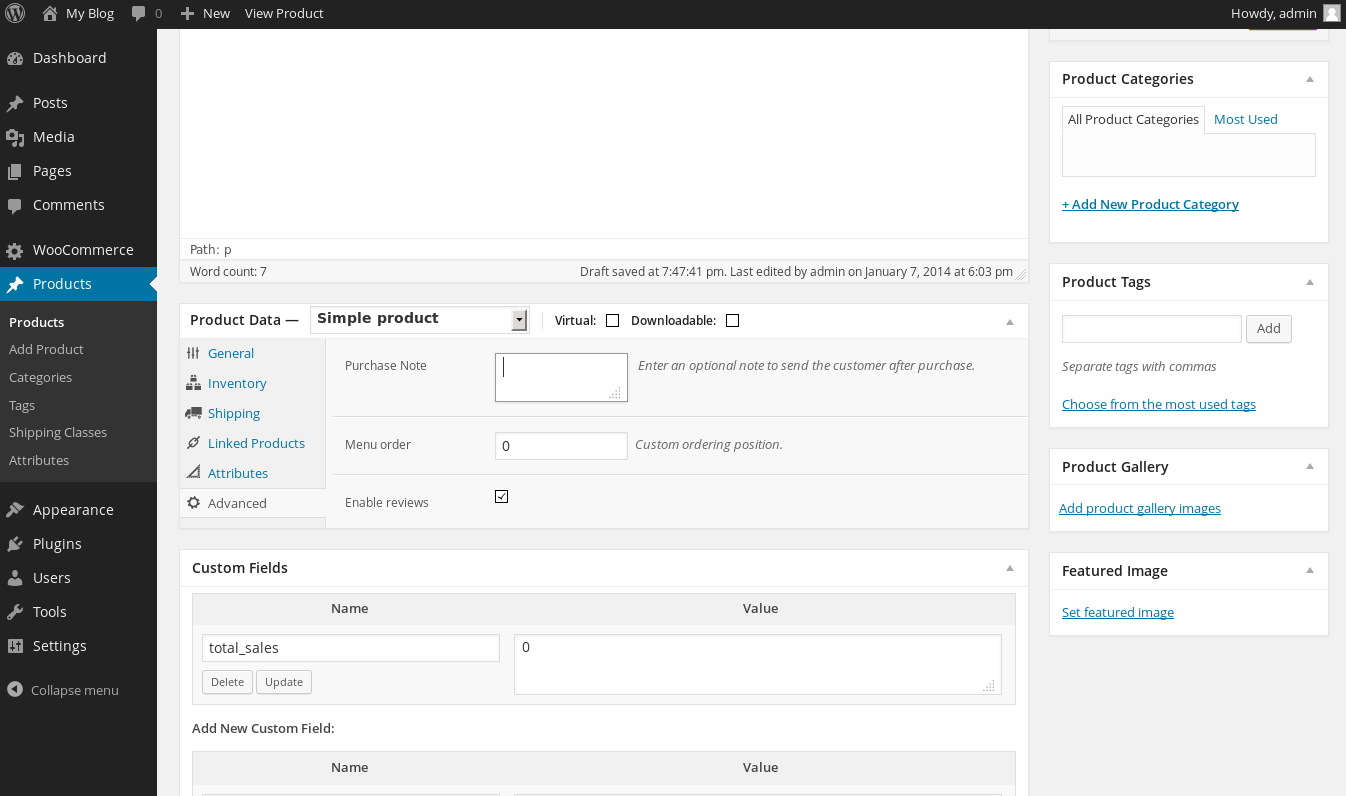
- The final tab in the Product Data section is the Advanced tab. Here, you will be able to set a purchase note to send to any customers that purchase that specific product in your WooCommerce shop, as well as set the menu order (a value of “1” would mean that the product will display first.) of the item and enable reviews if you like.
- Now that you have the configuration for the product itself all set up within the Product Databox, you will need to add just a few more things to your product to make it fully configured. Next, look over to the right side of this page for the Product Categories box. Here, you may add your new product to any existing categories that you have for WooCommerce, or create a new one.
To add it to an existing WooCommerce product category, simply select the checkbox to the left of that category item. To create a new WooCommerce category, click the Add New Product Category link at the bottom of this box.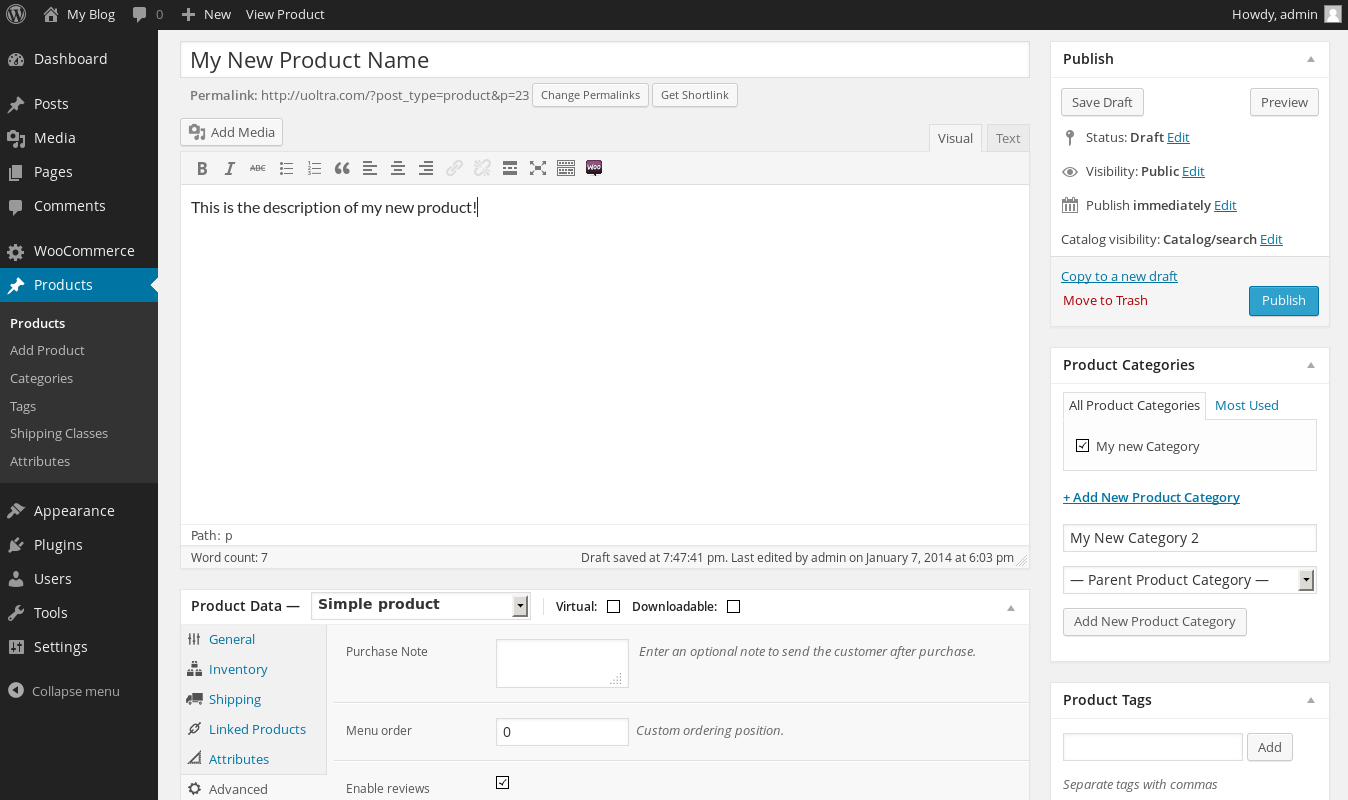
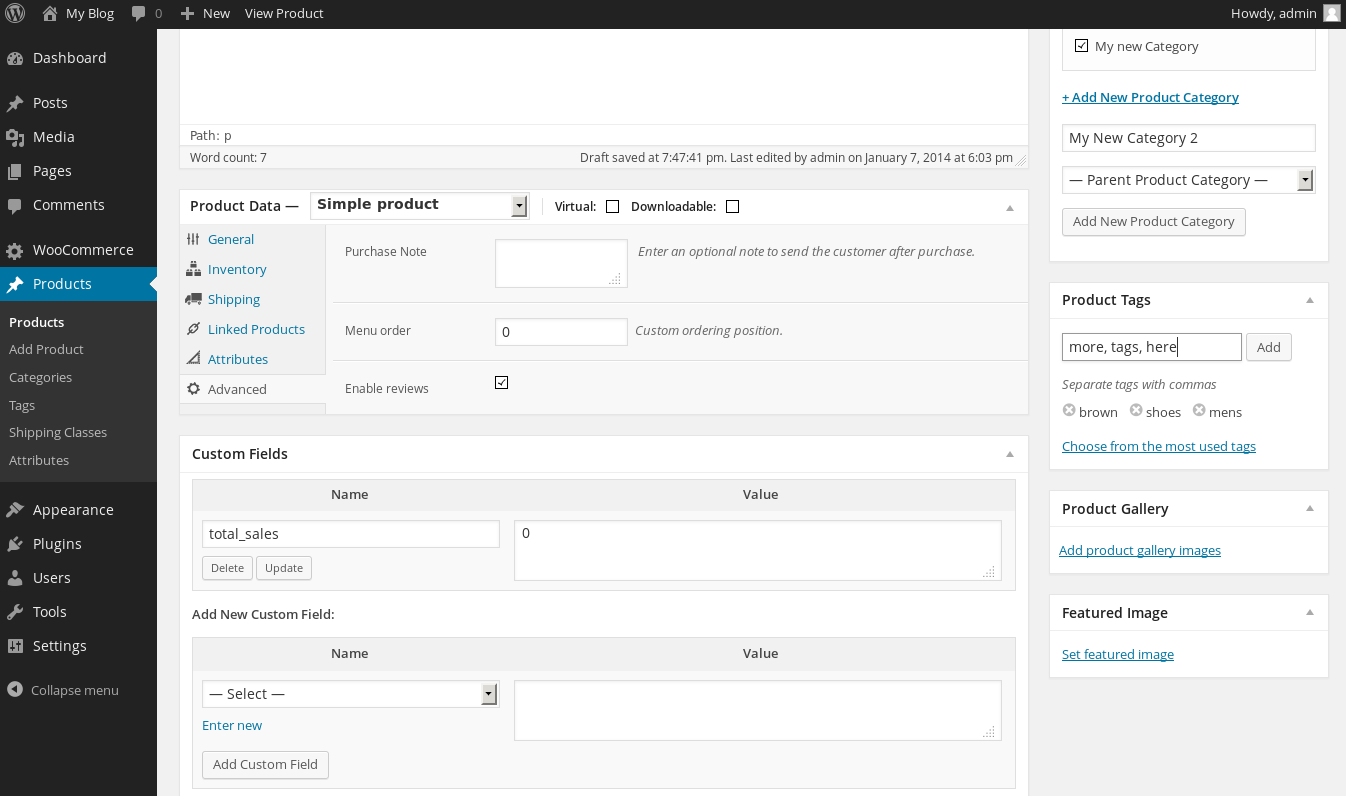
- Next, you’ll want to add any tags for the product using the Product Tags section. This section is located directly under the Product Categories box and will allow you to set individual tags to group products together. For example, if you were selling a pair of men’s gloves, you would enter something like “gloves, leather, men’s” to add these 3 different tags.
- Of course, you will want to add some images to your product as well to show visitors to your WooCommerce shop exactly what they are purchasing. There are two different options for this: gallery images, and a featured image.

- The gallery images are various images that will be displayed on the WooCommerce product page. The featured images will be the image that is shown within the various thumbnails, as well as the first image that is shown on the product page.

- First, you will want to upload any images that you have for the product by clicking on the Add product gallery images link under the Product Gallery box to the right side of the page. Then, be sure that you are on the Upload Files tab, and either drag and drop the images to this window, or click the Select Files button and navigate to your images stored on your local computer. Once complete, click on the Add to gallery button. To select your uploaded images to use in the product gallery for this particular product in WooCommerce, select the image within the Media Library tab, then click on Add to gallery.

- To set your featured image, click on Set featured image within the Featured Image box directly underneath the Product Gallery box. From here, you may select an image from the media gallery to set as your featured image, just as you did for the product gallery.
- Now that you have set up your new product in WooCommerce, click the Publish button. Your product is now live within WooCommerce.
